Monday, 14 December 2015

Simple Pleasures - Drawing with Crayons

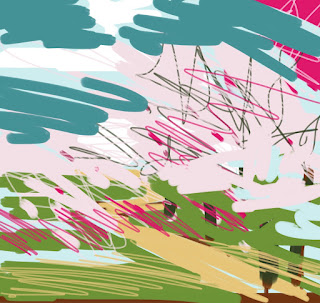
Recently I have rediscovered the simple pleasure of drawing with crayons......here are a few of my little tree studies (up to about 45 now).....


In fact it was earlier in the year when I did some drawings based on photographs I remembered how much I enjoyed it - though it is definitely a particular mind state -  the combination of really careful observation, focused attention, shutting out everything else - being able to rub out (phew!) and all those yummy colours in my crayon tin! Heaven.

 Small Feather, Blue Stones


It brought back so many memories ranging from story-board "snowman" type cartoons I did on my graphic design course to copying by sight and colouring endless Disney characters when I was about eight years old.  I have a vivid memory of being really pleased with my Lady and the Tramp dogs! Then I remembered an entire set of characters I drew as the basis of a book when I was about twelve......

I took my kids to the Derwent Pencil Museum in Keswick when they were younger - a museum all about pencils and crayons - with history dating back to 1500. It was very interesting even for those not in love with all those tins and colours. I was treated to a luxury set of 72 colours - and now I am really beginning to appreciate them.
Unfortunately they seem to have been affected by the recent bad flooding in Cumbria and are closed for refurbishment but I am hopeful you can still buy online.
Here is the link 

Sunday, 6 December 2015

Drawing as an expression of feeling

I have re-connected to some work I did last year - it was a series of large drawings done with a big brush and black paint, one on every day for a month. The drawings had one criteria - to move the brush as an expression of feeling. I then selected elements of these drawings to make a series of collagraph prints. Some of which are shown here.....


 The prints also led to some paintings - here is one example 


Sunday, 29 November 2015

Studio Life - plus RA insights

It's so interesting to see artists studios - they are like maps of character and unique creative neural pathways rolled into one. How studios are arranged or not arranged, what's on the wall or not on the wall, tidy or messy (and why?) is it full of colour or monochrome? It's fascinating. I admit I am extremely nosy when it comes to studios. Treasure troves.

Then there is another layer of individuality - does work come in a rush or over a long period, does the artist like to be solitary or gregarious. Music or silence? The RA are doing an interesting series about RA artists studios - see the link at the end of this post.

I feel fortunate to have a space I can leave in a ready-to-work state. Every now and again I have a big clear up - especially if I have come to the end of a series of paintings or prints. My choice is to have nothing on the walls if I can. I have one area of wall acting as a sketch book where I pin things that I want to remember, investigate or pick up at a later date. I often play music on repeat if it helps me to maintain the state of mind that I am after.

In the middle of a painting - paints are out and a clear patch at the far end of table for drawing
GOLDFISH BOWL SYNDROME?
Just as goldfish grow to be a size that is compatible to the size of their environment, I know that if I had three times the space I would easily fill it and my work would get bigger. It's an interesting thought. Do I let the size of my studio determine what I make? 

I had a chance to take quick pictures of the studios of some of the very talented artists in my building. Here they are..... and you can check out their websites too.


Ceramic Artist Debbie Bent click here for her website
 Textile Artist Amanda Bloom click here for her website
Painter Cathy Smale click here for her website


Here is a link to a great series about studios that the RA are doing. Slightly envious of the space!! 
CLICK HERE


Monday, 23 November 2015

Monotype Transfer Printing


This simple method of printing which can be done without a press, can give stunning and characterful results, you can do this at the kitchen table.

You will need
  • Printing ink (oil based) I use Caligo Safewash Etching Ink which is brilliant as it can be cleaned up with soap and water and washes out of clothes.
  • A plate to ink up (smaller than the paper you are going to be using). This can be made of a thin sheet of rigid plastic, rhenalon, perspex or even the stiff paper of a glossy magazine cover.
  • Some paper (simple A4 printing paper with suffice at the start) It can't be too thick.
  • Something to roll the ink out onto (I use an old wall tile) but you could use the front of an old glossy magazine 
  • A roller (mine is an inexpensive hard rubber roller found in craft stores)
  • Various type of pencil soft and hard, sharpened or blunt
Before you start it's important to remember that printmaking takes practice - there are lots of contributing factors - the paper you use, the ink, how the ink is rolled out, the temperature of the room, the type of lines you draw. Treat your first attempts as practice and a chance to learn what's what. 
REMEMBER YOUR PRINT WILL BE MIRROR IMAGE TO YOUR PENCIL DRAWING
You can draw portraits, patterns, landscape - anything you want - its up to you
Try using different pressure for light and dark tones, using lines in one direction only, cross hatch and so on


A little too much ink on the plate here - I have had to draw into it to get back some subtlety

This one is successful I think because there is lovely contrast in tone and spontaneity in the drawing
I love the soft lines reminiscent of dry point, and the random imprint from the plate - it all adds to the character and atmosphere of the drawing
Just experiment with lines and patterns, light dark and mid tones (varying pressure with the pencil)
These are some done at a recent drop in workshop with coloured ink


Here is a link to a very basic video tutorial

https://youtu.be/cD6JMgSimkc

And here are written instructions to refer back to
Roll out the Ink
Place a very small quantity of printing ink onto your wall tile. The aim now is to cover the roller with an even layer of ink and you do this by repeatedly rolling into the ink, lifting your roller each time so that it spins round (this ensures an even coating).

Ink up your plate
Place your plate on a sheet of newspaper and using the inky roller cover the plate with an even coat of ink. This time don't let the roller  spin round too much and change the direction you roll in every now and then. The ink should be very thin, but even. It helps if your plate is transparent because then you can hold it up to the light to check it.

Draw Your Image
Remember your printed image will be mirror image to the one that you draw.
When the plate is ready move it to a clean surface PICK IT UP BY THE EDGES ONLY to avoid fingerprints and place it INKY SIDE UP.
Place your sheet of paper on top of the plate. Try to place it so that the plate is central to the paper.
DON'T SMOOTH IT DOWN (surprising how many people instinctively do this) AND AVOID TOUCHING THE SURFACE OF THE PAPER  WHILST DRAWING (to avoid transferring fingerprints onto your drawing) How may times have I done this? LOADS! 

Feel carefully for the corners of your plate and mark them with a small dot so that you know where to draw your image.

Now draw your image - you can experiment with hard and soft pencils and different density of marks. Your drawing can be spontaneous or carefully planned and traced out.

Pull the Print
When you have finished your drawing hold the plate carefully with your finger in one corner and pull the paper off the plate from the diagonally opposite corner . You can have sneak peak like this as long as you are holding the plate steady and you can put the paper back down to draw onto again if you are unhappy with any areas of the print.


Sunday, 15 November 2015

Digital dabbles

I have mixed feelings about using digital devices to create art - I know some people are brilliant at it and I like many others was really inspired by Hockney's ipad drawings when I saw them at the RA. Here is an example of one of his which I love.
 
Believe me this takes hours and is built up in multiple layers and is, needless to say, backed up by tremendous drawing skill.

Contrast this to the freedom and spontaneity of mark making found in Barbara Rae's sketch book.
Barbara Rae
Here's the rub for me - essentially I feel I am missing out when I'm not sloshing the ink, mixing the paint and smudging oils pastels about. It's the physical involvement. Old school, as my son would say.


I have used the Brushes App and found it interesting - it makes me think in layers and to think them through before I start.(a sometimes greatly needed skill for painting anyway). It also brings out a graphic element to my drawing - interesting as I trained in graphic design. It allows video playback of the drawing's creation too, which is fun.


Here are some of mine - produced using my finger on screen all in under an hour.
They are all screenshots which is why the titles are there (explanation later)


I wish I could show you a video of one of them being drawn but technology won't currently permit... which brings me to a small warning:
Like thousands of others I was dismayed when I upgraded the software on my ipad and found that I could no longer even open around fifty drawings I had done. That's why the drawings above are screen shots. Alas, it's a situation that is still not fixed and probably never will be. I can tell you it put me off for quite a few months. The nagging question is will the next upgrade do the same? Its a free App so there is no come back.

I take photos with my ipad or phone when out and about to use later and have just heard of an App (Adobe Color CC) that enables you to take photos on your iphone and create colour swatches from them - now that excites me as it dovetails with the way I work. Will let you know how it goes.

So at the moment this is where digital drawing/painting sits for me - as a good tool, but I'm not sure I'll ever fall in love with it.

It reminds me of a university class I read about - digital artists who had a printing module on their course using real paper and a press. They were blown away by it! Some of them even switched courses. Life is strange, but I know how they feel.

Here is an example of a drawing I did on the ipad that I used as reference for a monotype print using oil paint on paper.


Saturday, 7 November 2015

The Lost Art of Darning - and Drawing

Hi all
I had a short conversation with my daughter this week about the lost art of darning (socks). Strangely it lead me contemplate the lost art of drawing...and rather than go round the hamster wheel of the art debate, I decided to start improving on my particular lost set of drawing skills. 

I have enlisted the help of two really excellent books. Here is the first one


Written by Mick Maslen and Jack Southern, it's a brilliant set of exercises and drawings to look at. However, rather like a good cookery book, it has sat on my shelf for a year. I have rarely actually DONE the exercises in it, thinking that looking at it would somehow make me a better cook (or artist). Anyhow, here goes....

This exercise is to position your paper in front of you (sitting or standing). Use any drawing instrument you like. Then shut your eyes (and don't open them at all). Draw with your dominant hand in response to feeling the contours and textures of your face with the other hand. I did three like this.

Yes, I know everything is everywhere -  but to me it is very interesting to look closely at the quality of line - it has a lot of sensitivity to it.

I think it's half an hour very well spent. 

Plus, at the end I felt like I had had a facial (!)... which I can only explain by the fact I was touching my face with a sensitivity not usually afforded day to day. Another revelation.


By drawing three (below), my brain was frantically trying to beat the exercise and really concentrate on scale and placement - trying to map the exact distances my fingers had moved and scale it to the page. Well, this might be good if the sensitivity still remained, I was thinking to myslef. But then, with all that effort in the wrong direction (thinking, not feeling),  I opened my eyes for a split second....(oh Maaan!). Resist looking and relax I told myself... but the charm had gone. Have a go.


Sunday, 1 November 2015

The dreaded disconnect OR when it all goes wrong PLUS a fantastic short film

Hi all
Today I'm writing about a painting I have been working on and some of the pitfalls I have experienced whilst doing it. Plus don't miss the link to a great short film about some
abstract artists on BBC iplayer - see bottom of post

It started as a commissioned idea from my husband, a large abstract painting, featuring certain colours- Here's how it started
Now I like this - particularly the gestural freedom and balance of the white space top right

My husband likes the suggested implication of a seascape. Hmmm... here is where I start going wrong and the dreaded disconnect happens. The points on the train track have been switched and I am now going in a different direction.....watch what happens


By this stage I walk into my studio and realise I have two separate paintings on the go  (both in style and intention!) roughly splitting the painting top and bottom. I like the bottom, not the top. At this stage there is a choice -start again or try to get back on track.


Here I aim to introduce tonal variety in the foreground and at this point I think the rest of it is not working at all (ghastly!)


Now I have to do something - I sand down half the painting (I have been using a palette knife and there is too much texture in the overworked parts)

I reclaim the empty space top right and get back into the more gestural mark making


Phew that's better. I know this because I actually felt a small sigh rather than an uncomfortable cringe when I came into my studio the other day!
Now I use bits of paper to assess the changes I need to make. A useful tool.


  Great I can see there's scope here now. So calling over the benefits of the experience

1. When I start something I need plenty of uninterrupted time to stay on track
2. Be brave, know when it's wrong or cant be saved, start again
3. Don't listen to anybody else !
will post the finished painting at another time. 
Here is the link to the film if this does not work copy and paste it into your browser - its worth it (its on bbc four archive)
 http://www.bbc.co.uk/iplayer/episode/p00b67hh/artists-on-film-scenes-from-working-lives-episode-5

Sunday, 25 October 2015

Trees are fantastic!

I am lucky enough to live in a town that has many tree-lined streets - I decided to make some small studies and collect them with a view to expand on the windows idea seen in my last post. Trees therefore have been jumping out at me everywhere!
Here is the route to my local supermarket - 


and a fantastic show not far from the station

Doing these tree studies reminded me of some miniatures that I found in a drawer the other day - I couldn't quite believe I had made them...they measure 5x4cm! My eyes must have been good!


Here they are...


I must have had endless uninterrupted hours! It is heartening to feel that the sense of concentration for these small tree studies is still there and some of them (especially those painted outdoors) capture that feeling of being lost in something for a while. They are either worked from photos taken out and about on walks or painted en plein-air. They are all 10x10cm or there-about - it's great trying to get a sense of depth and landscape into a small area. I have tended to take about 20/30 minutes for each one and have made about 30 this week. Here's a few


Again I am going to have fun arranging them and playing with scale because I can already see small sections of these studies that will make interesting larger scale prints or paintings. I will try and show you one of these transformations in a later post.